Guide to Automotive Lift Installations
Automotive lifts increase job safety by eliminating the need to bend over, crawl underneath cars, and squeeze into hard-to-reach places. They’re also great for bays with limited space.
If you’ve recently purchased an automotive lift, you may have some questions, including: how do I install it? Should I install it myself or have someone else do it for me?
In this guide, we’ll cover everything you need to know about automotive lift installations.
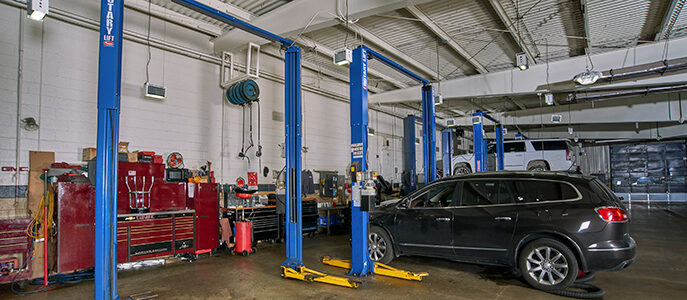
Selecting Location
First, selecting where to install the lift is a critical aspect that most people overlook. If you have unlimited garage space, you won’t have as many restrictions; it only becomes a concern when you are short on space. If you’re working with limited space, be sure that you install your lift in a spot that allows you to work around the lift’s posts.
You also need to ensure your existing concrete can even support the lift. The floor should be solid and deep enough to support the lift’s columns. Before you purchase any lift, be sure to check the pre-existing floor requirements. You will usually find a minimum thickness (in inches) and compressive strength (measured in PSI).
If your garage floor is not strong enough, there is a way around it. You can identify where the lift will be installed, dig deep holes, and fill them with concrete. Of course, this option is much more difficult and time-consuming. In the end, it’s best to just purchase an automotive lift that’s designed for your existing space.
Automotive Lift Installation Steps
1. Assemble
The first step to any automotive lift installation is to assemble it. Ensure that the individual components remain square and aligned with each other. Check the alignment and range of motion of all bolts, and then tighten them by hand. Finish assembly by torquing the bolts to spec. It’s essential that you apply enough torque. Too little or too much torque can cause a wide array of problems down the road.
2. Install Hardware
When installing automotive lifts, you have to balance the cables and hook up the hydraulic lines and safety locks. It’s best to do this when the lift is still on the ground.
As the name implies, balance cables help the automotive lift (and the vehicle on it) stay balanced and stable. The balance cables should be mounted to your lift with a bolt end, nut, and lock nut. You will also need to lightly tension the cables, which will help them stay in place during the installation process.
Your hydraulic lines give your lift the pressure it needs to raise and lower cars. To install the hydraulic lines, you’ll want to attach them at the bases of the cylinder. Next, you’ll want to install/mount the fluid reservoir and pump. Then, you’ll attach the pump outlet to the hose. Lastly, you’ll want to tighten all of the joints.
3. Raise
After you’ve assembled the lift, the next step is to raise the lift. You’ll want to first mark the floor to outline the end position. When marking for placement, you’ll want to take the actual vehicle into account (think about how the car will approach the lift and how any turns or corners may obstruct that).
It’s also important to note that raising lifts is not a one-person job; you may need to contact some friends for help. Raise the lift carefully, taking care not to let it tip over. Once it’s completely raised, use a mallet to lock the columns into position.
Once the columns are in position, you’ll want to use a rotary hammer to drill through the mounting plate holes. Then, take a three-quarter-inch wedge anchor and place a nut just flush with the end. Use the rotary hammer to pound the anchor and nut into the mounting plate. Be sure to apply the correct amount of torque to the anchor/nut after it’s hammered into the mounting plate. Additionally, all columns will need to be 90 degrees vertical. If they aren’t 90 degrees vertical in every direction, you’ll need to unbolt the anchors, add shims, and start over again.
After this is done, you’ll want to finish the job by installing power to the pump (you’ll want a professional electrician to do this part for you) and filling the hydraulic reservoir.
4. Test
Just like any garage equipment installation project, the last step should always involve a thorough evaluation for safety and overall performance.
Double check that all fasteners are tight and inspect for any potential hydraulic leaks. Additionally, all automotive lifts come with installation manuals. Inspection requirements may vary based on the manufacturer and model, so be sure to consult with the manual before placing a vehicle on the lift.
Once your safety inspections are complete, you’ll want to test the lift itself. Be sure to use a car that could potentially take some damage. You don’t want to raise the lift to its full height just yet. Do it slowly, and check to see if your control cables need any adjustments. We also recommend that you shake the vehicle in order to inspect the overall stability of each column. No matter what type of lift you’re installing, you cannot skip this step. You don’t want any problems to occur while you’re working on a customer’s vehicle.
Professional Installations Versus DIY
If you want your lift installed correctly, the best route to take is to hire a professional.
Performing a DIY automotive installation might sound like a simple task, but it can be quite difficult and time-consuming. We’ve already mentioned that this is not a one-person job. To ensure a safe installation, you’ll not only need a team of six or more people, but also the right tools and equipment.
Companies offering professional automotive lift installation services have the equipment, tools, and expertise needed to handle this type of project. Professional companies also know what to test for and know how to prevent common installation mistakes and errors. Overall, hiring someone with experience can potentially save you time and money, as well as help reduce safety risks.
Get Help from Allied
Allied, Inc. is a trusted provider of automotive lift installations in Michigan. In addition to providing installation services, we also sell a wide range of Rotary Lift products and other accessories. If you need help selecting the right type of lift for your garage, or want to schedule professional installation services, please contact us today.